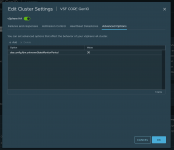
KB 55806 описывает уязвимость, которая связана с процессорами Intel.
Нужно смотреть ваши текущие настройки hyperthreadingMitigation ( отключено ) и hyperthreadingMitigationIntraVM ( включено ), к примеру .
\==+Kernel Bool Option :
|----Option Name........................................hyperthreadingMitigation
|----Configured Value...................................false
|----Runtime Value......................................false
|----Default Value......................................false
\==+Kernel Bool Option :
|----Option Name........................................hyperthreadingMitigationIntraVM
|----Configured Value...................................true
|----Runtime Value......................................true
|----Default Value......................................true
Что бы предупреждение исчезло нужно включить планировщик, а именно SCAv1 или SCAv2 ( рекомендуется ). Перед тем, как будет включен планировщик ознакомьтесь с пунктом 2 KB (
Planning Phase: Assess Your Environment ).
Включить планировщик можно одним из способов, которые описаны в KB:
Enabling the
ESXi Side-Channel-Aware Scheduler Version 2 (SCAv2) using the vSphere Web Client or vSphere Client
1. Connect to the vCenter Server using either the vSphere Web or vSphere Client.
2. Select an ESXi host in the inventory.
3. Click the Configure tab.
4. Under the System heading, click Advanced System Settings.
5. Click Edit.
6. Click in the Filter box and search VMkernel.Boot.hyperthreadingMitigation.
7. Select the setting by name.
8. Change the configuration option to true (default: false).
9. Click in the Filter box and search VMkernel.Boot.hyperthreadingMitigationIntraVM.
10. Change the configuration option to false (default: true).
11. Click OK.
12. Reboot the ESXi host for the configuration change to go into effect.
Enabling the
ESXi Side-Channel-Aware Scheduler Version 2 (SCAv2) using ESXi Embedded Host Client
1. Connect to the ESXi host by opening a web browser to
https://HOSTNAME.
2. Click Manage under host navigator.
3. Click the Advanced settings Tab.
4. Use the search box to find VMkernel.Boot.hyperthreadingMitigation.
5. Select the VMkernel.Boot.hyperthreadingMitigation setting and click the Edit Option.
6. Change the configuration option to true (default: false).
7. Click Save.
8. Use the search box to find VMkernel.Boot.hyperthreadingMitigationIntraVM.
9. Select the VMkernel.Boot.hyperthreadingMitigationIntraVM setting and click the Edit Option.
10. Change the configuration option to false (default: true).
11. Click Save.
12. Reboot the ESXi host for the configuration change to go into effect.
Enable ESXi Side-Channel-Aware Scheduler Version 2 (SCAv2) using ESXCLI
1. SSH to an ESXi host or open a console where the remote ESXCLI is installed.
2. Check the current runtime values by running esxcli system settings kernel list -o hyperthreadingMitigation and esxcli system settings kernel list -o hyperthreadingMitigationIntraVM
3. To enable the ESXi Side-Channel-Aware Scheduler Version 1 run these commands:
4. esxcli system settings kernel set -s hyperthreadingMitigation -v TRUE
5. esxcli system settings kernel set -s hyperthreadingMitigationIntraVM -v FALSE
6. Reboot the ESXi host for the configuration change to go into effect.

